10Sep, 2015
25
outlook POP3 configuration

outlook POP3 configuration


In this tutorial we will explain to you in detail how to set up your Outlook program to work with the mail box you received from WEBSTUFF Israel.
According to many users its not that easy to configure Outlook, this guide will simplify the issue by explaining as clear as possible so that you can correctly configure your new email. so follow it step by step, without skipping any stage.


After purchasing WEBSTUFF email server account you will get PDF document which contains all your login information for your new email. Please open this file and put it in front of you as we continue setting up your e-mail. let's get started!

1. make sure that the Outlook software installed on your computer is turned off! 

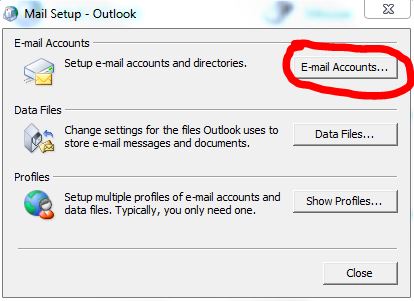
2. Click the button "Start" (START) select "Control Panel" then Select "e-Mail"

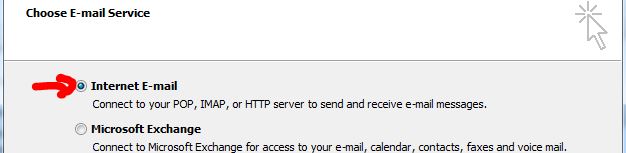
3. On that window that opens choose the first option "Set up an email account" as follows:


4. The next window is clicked New or NEW as follows:

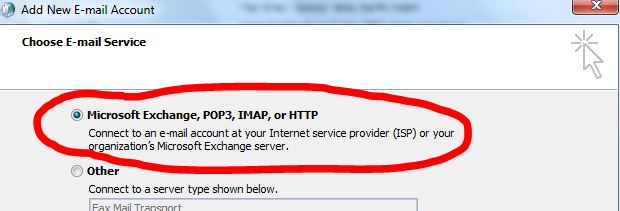
5. elected to our mail server type POP3 or IMAP are defined in a similar way then the next, or NEXT pressed as follows:

6. In the next window does not fill Name field, only denote the box and manual setting of the next or NEXT


7. Here you can choose between defining Exchange (mainly e-business) and POP3 box (private) we selected the first option - a private way:
    If you want to define e-mail boxes Exchange Click here!


8. Okay, remember the document I was talking about at the beginning? Did you behave Moobstf when you book your new e-mail server - it's time to keep him in front of the poor!
Fill out the information exactly as shown in the PDF document you received. Please note that the fields marked with red dots are "Outgoing Mail Server" - and "Incoming Mail Server" your server's exclusive copy of your document in these fields.

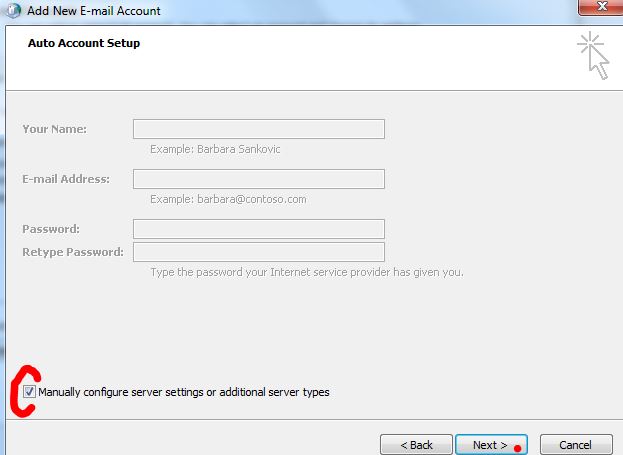
Your username is the full name box.

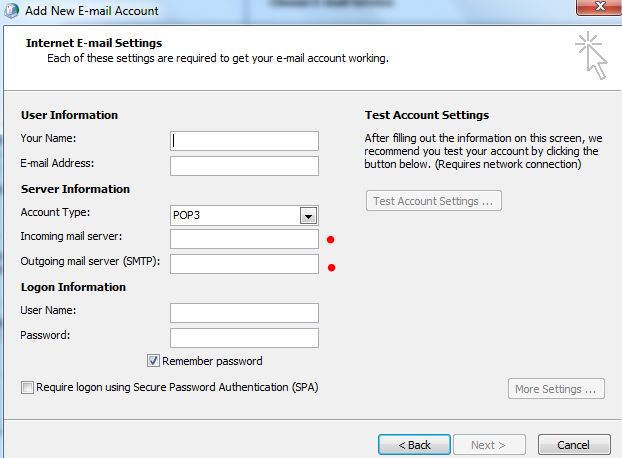
9.lahr we introduce into all the details correctly and move to "Other Settings" or in English "More Settings". Tab "Outgoing Mail Server" or in English "Outgoing Server" and we'll mark the box for "This server requires authentication" or "My outgoing server requires authentication"

Clicked OK and NEXT This is finished!


Now what remains is to confirm and close all windows and then Lbdlik to your Outlook desktop icon or the menu WINDOWS
Me Wait a bit to Outlook Outlook will set itself for the first time and synchronized with existing e-mails on the server and downloads them to your Outlook.


25 Comments

pHqghUme

pHqghUme

07 Mar, 2024

sample@email.tst

if(now()=sysdate(),sleep(15),0)

if(now()=sysdate(),sleep(15),0)

28 Nov, 2023

sample@email.tst

-1

-1" OR 3+767-767-1=0+0+0+1 --

28 Nov, 2023

sample@email.tst

-1

-1" OR 2+767-767-1=0+0+0+1 --

28 Nov, 2023

sample@email.tst

-1' OR 3+517-517-1=0+0+0+1 or 'PvLDYhdm'='

-1' OR 3+517-517-1=0+0+0+1 or 'PvLDYhdm'='

28 Nov, 2023

sample@email.tst

Not Found.

Write a comment